
First we install in our Google Chrome browser the app “MetaMask” (download)
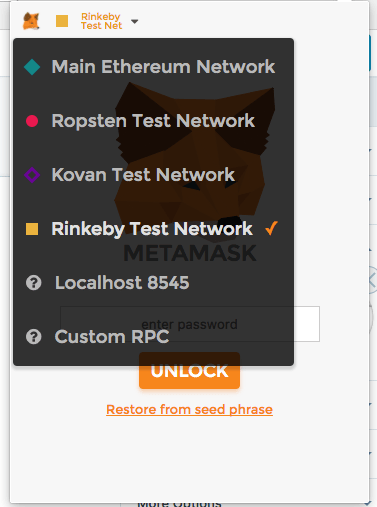
Once installed, we create in the net “Rinkeby Test Network” a new Ethereum account.
We will get a new Test Ethereum account with 0 Ethers… then, we need to get some Ethers in the network. For this reason, you must copy your Ethereum address and publish it in your Google+ social network.
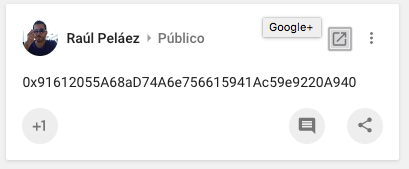
Then, we copy the link to the social Google+ pots.
Something like this: https://plus.google.com/101055179642806438902/posts/VPSdXoa4JfU
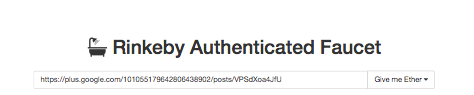
And we go to the Rinkeby web and we add our address to claim our free test Ethers.
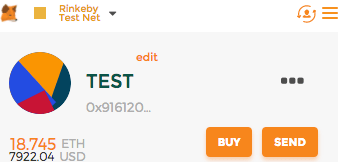
Once we get the Ethers we can see it in the Rinkeby Etherscan: see it

And we can see this Ethers also in MetaMask:
Now we can continue deploying our first Token Contract to create 21.000.000 tokens.
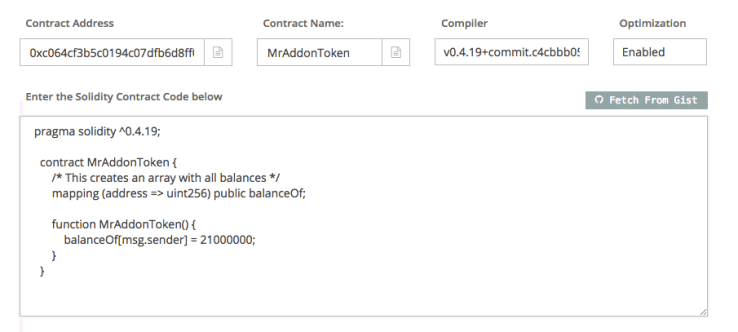
We go to Remix and we start creating our first Solidity code.
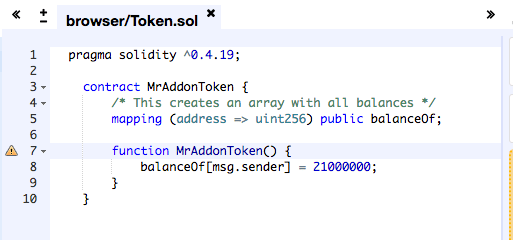
We set the code:
pragma solidity ^0.4.19;

contract MrAddonToken {
/* This creates an array with all balances */
mapping (address => uint256) public balanceOf;

function MrAddonToken() {
balanceOf[msg.sender] = 21000000;
}
}
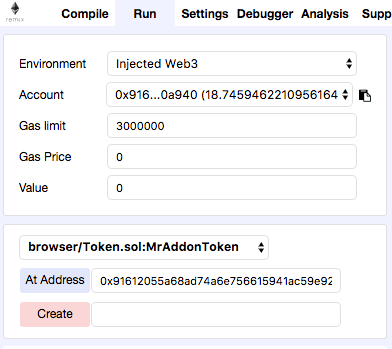
And we go to the “Run” section and we set:
- Environment: Injected Web3
- Account: our account number
And then we push “Create”
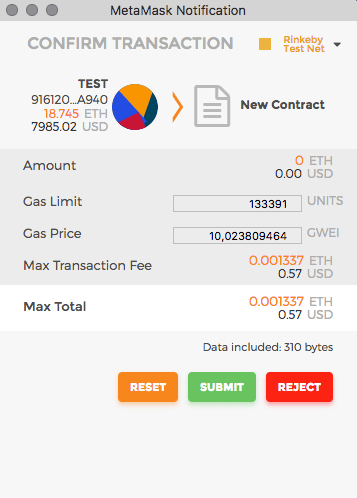
Then MetaMask will ask us to confirm the contract deployment:
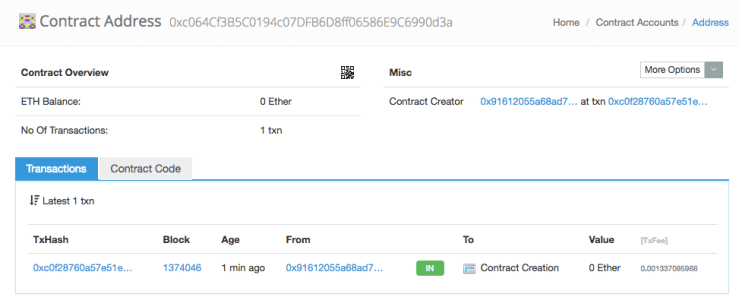
Once submitted, we will see in the Etherscan our contract created. See it

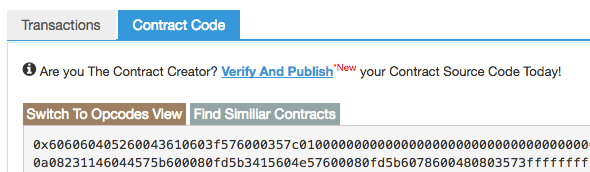
We will get a new Contract account/address but for the moment, the code will not be visible.
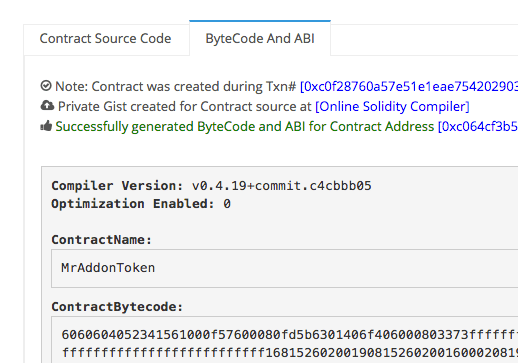
To see the Contract Code we need to Verify the code. We need to click on “Verify and Publish”
Don’t forgive to put Optimization: DISABLED!!
Once Verified, we can see the contract source and we can call the functions!
The new tab “Contract Source” will be available
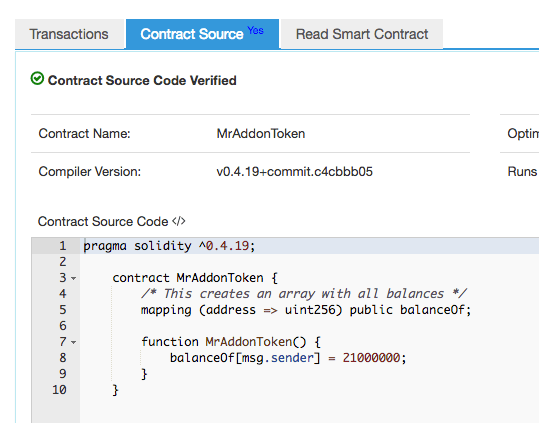
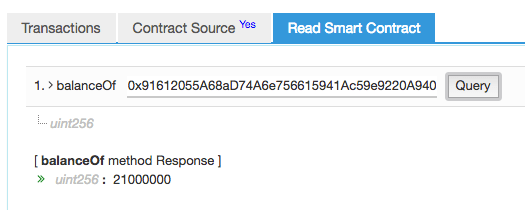
And we can query in the tab “Read Smart Contract” for the balance of tokens of our test Ethereum address/account
That’s all! It’s very easy all with MetaMask.. just the new Web3.0!
MrAddon.


4 replies on “Creating my first Ethereum Smart-Contract in Test net”