Creating our first JIRA plugin “Hello World”:
- enter in C:\atlastutorial
- atlas-create-jira-plugin
- Enter 1 for JIRA 5
- groupId: com.atlassian.tutorial
- artifactId: helloworld
- version: 1.0-SNAPSHOT
- package: com.atlassian.tutorial.helloworld
- Press Y to continue
Add a module to the plugin:
- enter in C:\atlastutorial
atlas-create-jira-plugin-module- Select the 30
Web Sectionitem by entering30. - Answer each question as follows:
Question Value Description Enter Plugin Module Name: mySectionA human-readable name for the section. This is only visible to administrators working with the Universal Plugin Manager (UPM). Enter Location: client-sites-linkA unique location representing this web section. Show Advanced Setup? N Not applicable for this tutorial
Press Y to add another Plugin Module.
- Choose
25: Web ItemQuestion Value Description Enter Plugin Module Name Client SitesThis is the name that will appear on the new menu. Enter Section system.top.navigation.barThe location in the JIRA menu where you want your custom menu to appear. Enter Link URL deleteMeMore about this later. Show Advanced Setup? N Not applicable for this tutorial
Answer N when prompted to add another module.
Open the atlassian-plugin.xml in the Source view and look for the web-section and web-item entries.
These entries were added for you when you added the modules. You can modify all text of the XML markups.
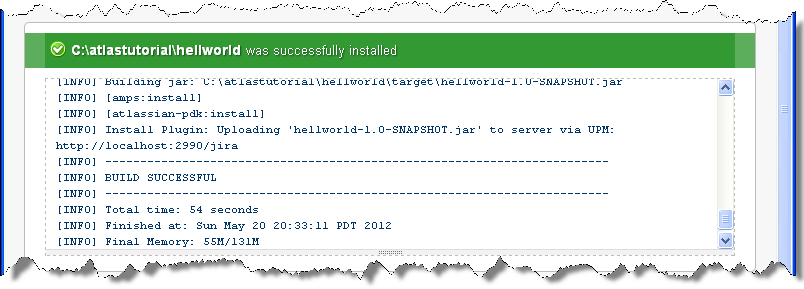
FINAL COMMAND: DEPLOY TO JIRA
- enter in C:\atlastutorial
- atlas-run
WELL TO KNOW!! TO DEVELOP FASTER
Create a new WebItem as example while your plugin are running
- atlas-create-jira-plugin-module
- Enter 25
- …
FAST DEPLOY!!!
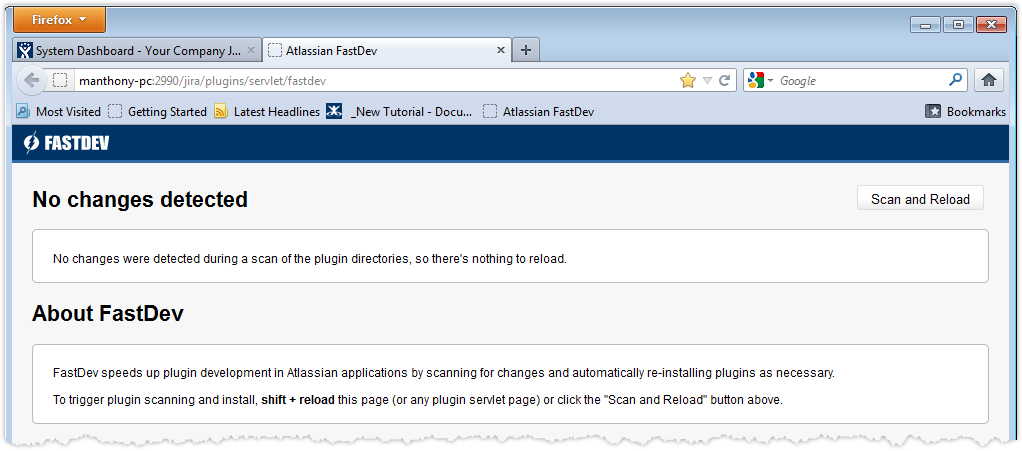
- Return to the browser.
- Navigate to the FASTDEV page for your project. The URL for this page has a format of
http://HOSTNAME:PORT/jira/plugins/servlet/fastdev. - Push “Scan and Reload” button
- That’s all!!!
This plugin also works on JIRA 6.3…and 7!