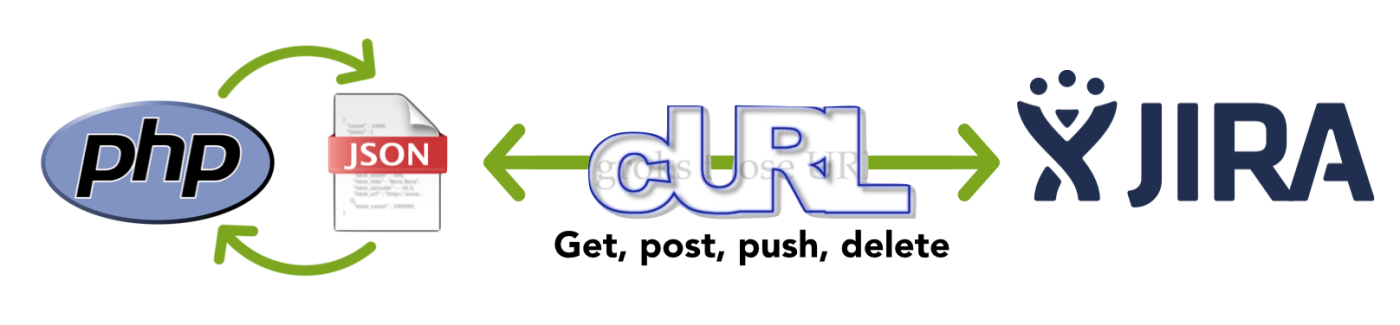
In this example, we will try to install in 5 minutes a PHP Jira Client script in a MacOS system. The prerequisites are:
- (Homebrew) brew for MacOS
- CURL for MacOS
- PHP 7 for MacOS
- Composer for MacOS
- php-jira-rest-client library
Install instructions with example:
Download and Install PHP Composer.
curl -sS https://getcomposer.org/installer | php

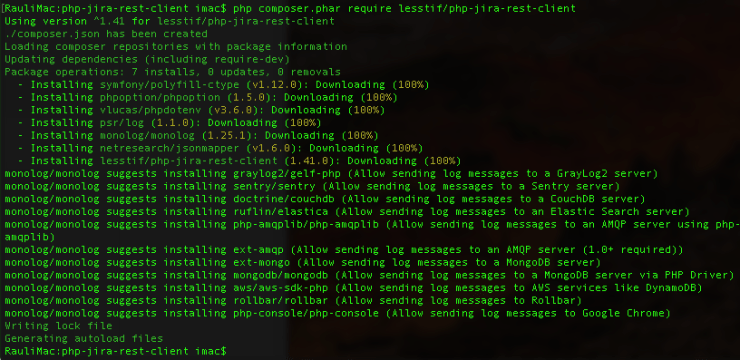
Next, run the Composer command to install the latest version of php jira rest client (and other dependencies like JsonMapper or Phpdotenv).
php composer.phar require lesstif/php-jira-rest-client
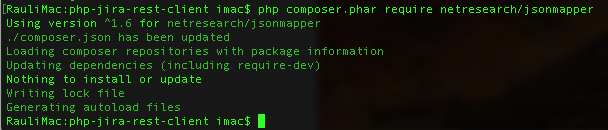
php composer.phar require netresearch/jsonmapper
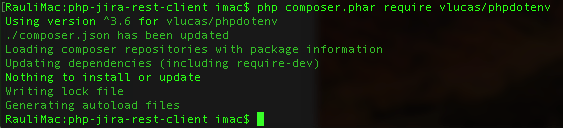
php composer.phar require vlucas/phpdotenv
Then run Composer’s install or update commands to complete installation.
php composer.phar install

After installing, create in the same directory a hidden file called “.env”:
vim .env
With this content (remember to adapt the parameters to your Jira installation)
JIRA_HOST="https://your-jira.host.com"
JIRA_USER="jira-username"
JIRA_PASS="jira-password"
JIRA_LOG_ENABLED=true
JIRA_LOG_FILE="jira-rest-client.log"
JIRA_LOG_LEVEL="WARNING"

JIRA_REST_API_V3=false
After installing, create in the same directory a file called “GetProjectInfo.php”:
vim GetProjectInfo.php
with this content: (remember to add the usual php tags)
require 'vendor/autoload.php';

use JiraRestApi\Project\ProjectService;
use JiraRestApi\JiraException;

try {
    $proj = new ProjectService();

    $p = $proj->get('TEST');

    var_dump($p);
} catch (JiraException $e) {
	print("Error Occured! " . $e->getMessage());
}

As you can see, you need to require Composer’s autoloader in the file:
require 'vendor/autoload.php';
Now we are ready to run the script!:
php GetProjectInfo.php

It’s very easy!
Here more info about the methods of the JIRA client PHP API
By MrAddon


